Over the past year I build a number of tools and utilities in Rust. Previously, I would mostly do this in node.js or shell scripts but Rust has some advantages:
- More reliable for long running and mostly unobserved applications (“once it runs is runs”), in particular no memory (leak) issues
- Needs less resources, upping the utility value of my various Raspberry Pis
- Setup and deployment are simple mostly due to the cargo package management and build tool
The last point I’ll describe in more detail. In particular, the project setup around file / directory organization, package tooling and cross-compilation. Rust has comparatively strict (but in my opinion well designed) best practices and “opinionated” defaults. Most of them come simply with the tools you use: cargo run expects binaries to be defined in certain ways for example.
To make this a little more concrete I will use my last holiday project as an example. fritzctrl wraps the API of AVM Fritz devices1 into a command line utility that allows to schedule turning on and off outlets and controlling thermostats. The code is open source and can be found in a github repository. This project is still quite small (~1000 loc), yet I took care to follow common guidelines when organizing the code base to allow the project to be easily maintained and grown in the future.
Project organization
Apart from github, the fritzctrl command line utility was also added to crates.io which allows installing it by running cargo install fritzctrl (this requires a local rust installation via rustup). This is all that is needed to get the utility installed - cargo will put it into it’s binary location (~/.cargo/bin/) that one can add to PATH. From that point on the utility is ready to use.
While building the tool I started to split up the user interface related code and the code that provides an interface (to the slightly obscure) Fritz API. The latter was published in a separate crate which allows other projects to directly interface with that. The recommended way of organizing a project into multiple crates and libraries / binaries is a cargo feature called workspaces.
Note that organizing a project into a workspace is not absolutely necessary to separate the code. You can easily define one or many binaries simply by putting .rs files into src/bin/. You can even use sub-directories if you want a binary to have sub-modules. But if your binary starts to have extra dependencies that are not required for the library, things get a bit more complicated. See this stackoverflow answer for more details.
Since workspaces are very well supported by cargo and related tooling, it’s advisable to go down that route if in doubt.
In case of my project the structure looks like this: The top-level Cargo.toml just points to the fritzapi and fritzctrl directories. fritzctrl/Cargo.toml references the lib via fritzapi = { path = "../fritzapi", version = "0.3" }. Note that there is also a version number, this will be used when the crate gets published and installed by other users via cargo. The path dependency is what gets when installing the crate locally.
├── Cargo.toml
├── Cargo.lock
├── fritzapi
│   ├── Cargo.toml
│   ├── README.md  <== generated using cargo readme
│   └── src
│       └── ...
└── fritzctrl
    ├── Cargo.toml
    ├── README.md  <== generated using cargo readme
    └── src
        └── ...
The project can be easily build an run from the workspace root directory. cargo run, cargo test, cargo doc etc. all work as expected.
Publishing to crates.io
If you have used a package management system like npm, crates.io will be quite familiar. You’ll first need to login to the crates.io website, which requires a github account. You then need to confirm your email address. Afterwards you can generate a token that when used on the command line with cargo login, allows you to publish and update crates. The cargo publish command can be run inside a project directory and will check and upload your project. However, I would recommend the cargo release plugin which automates some housekeeping tasks around publishing. It’ll bump versions (across all packages when run from a workspace root!), git tag and upload. It’s very handy, I like it a lot.
While we’re talking about cargo plugins: I can also recommend cargo readme which extracts rustdoc comments into markdown format that can be put directly into a README.md file. This will be automatically picked up by crates.io and will be what is visible on the project page such as crates.io/crates/fritzctrl. All of the content there was extracted from fritzctrl/src/main.rs with cd path/to/fritzctrl; cargo readme > README.md.
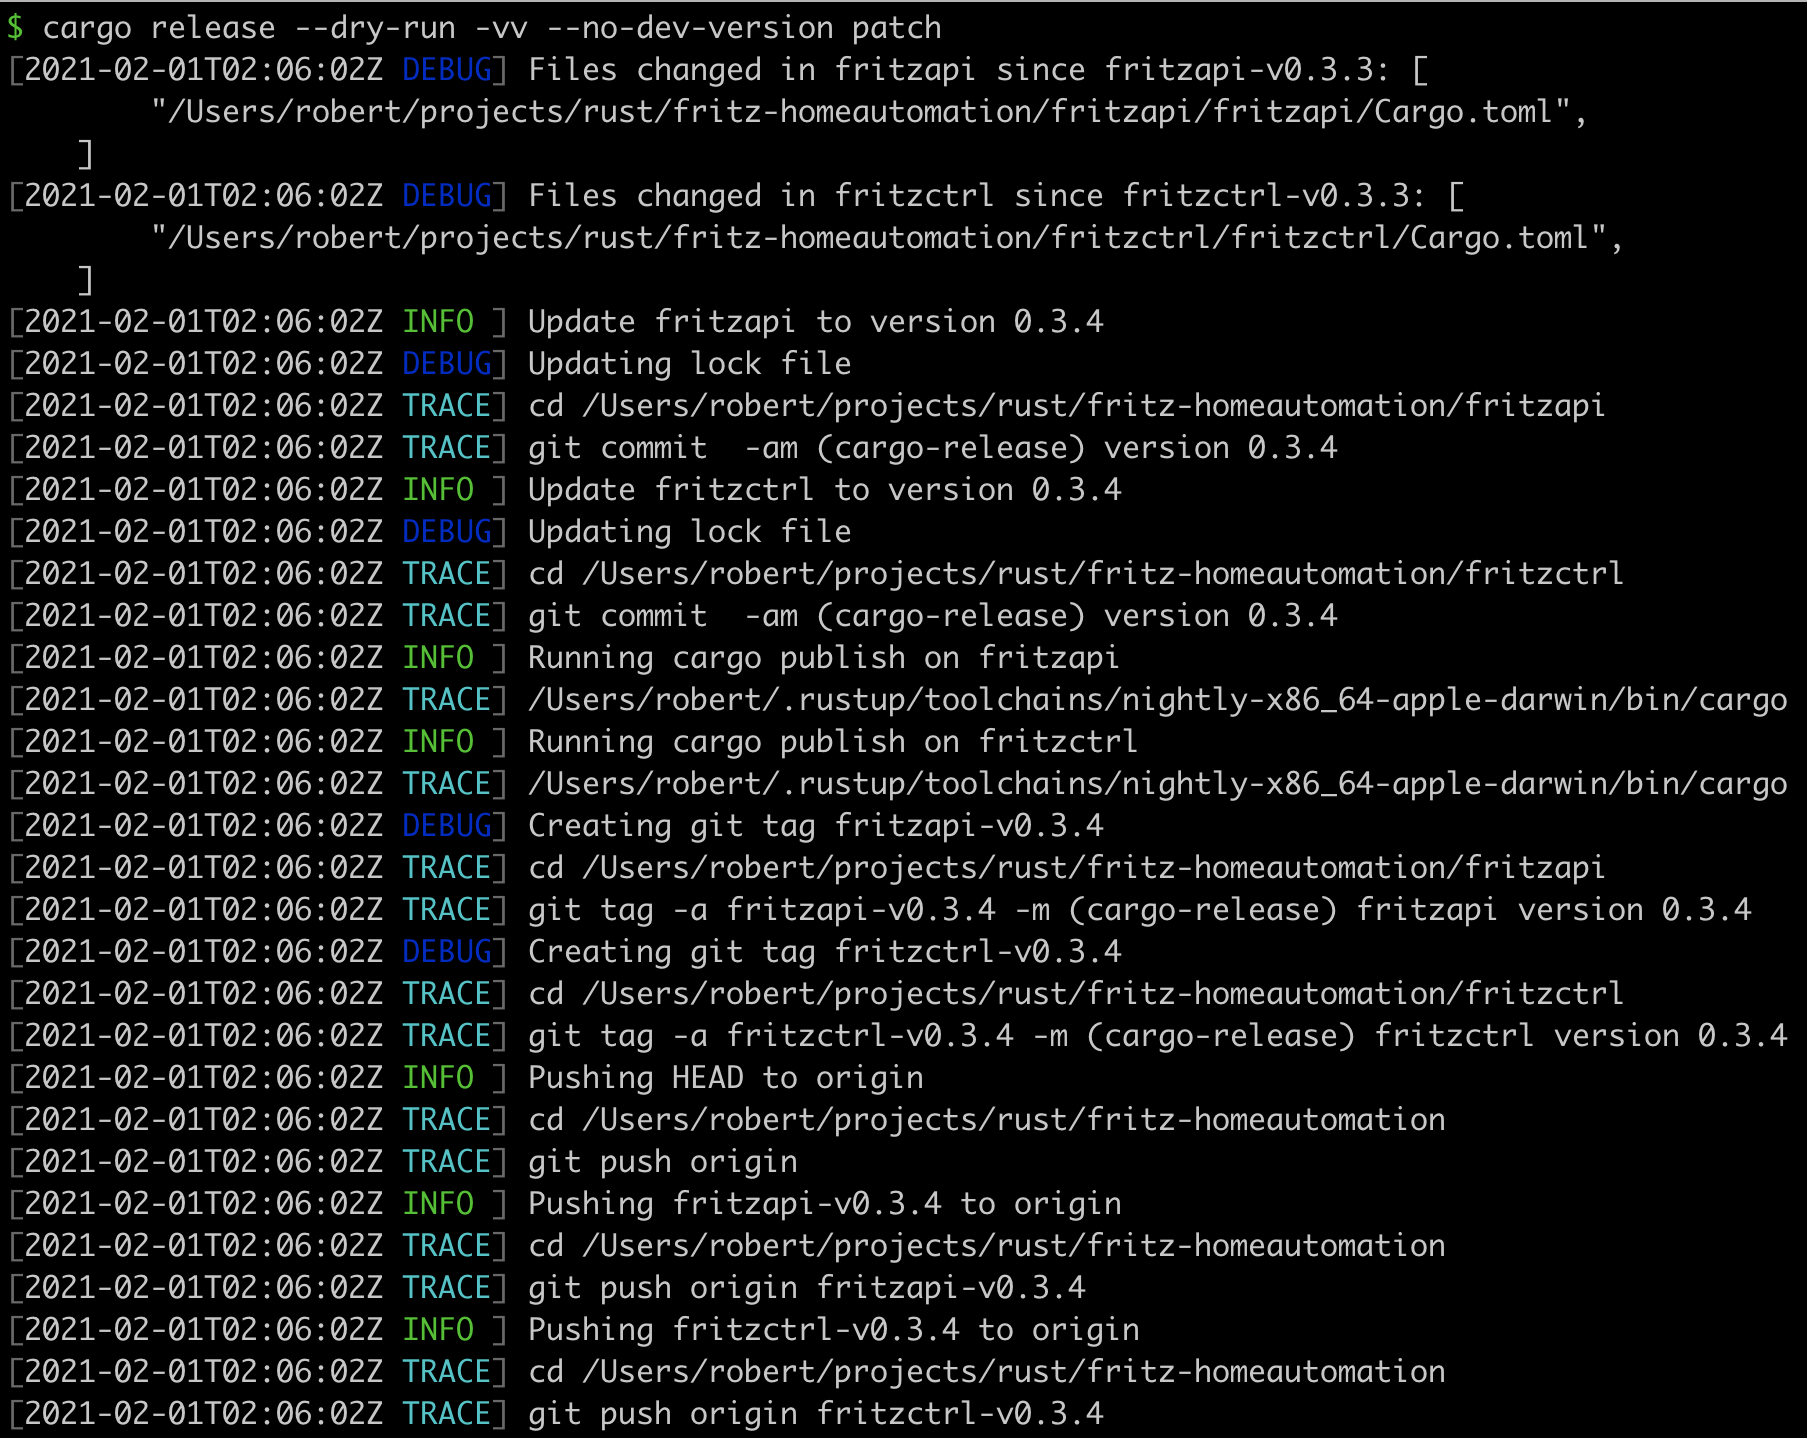
In order to publish a new version of both fritzctrl and fritzapi I would then commit all changes and switch to the workspace root directory of the project. There I’ll run cargo release --dry-run -vv --no-dev-version patch which provides a preview of the release commands that would be run.
If all looks good just run without the dry-run option and you should be done!
Cross-compiling
A big reason for me to choose rust is the ability to create stand-alone binaries that can simply be copied onto a server, into a docker container or onto a Raspberry Pi without much installation overhead in the deploy environment. Often, compiling on the target device itself is not desirable or possible. Raspberry Pi’s are very capable devices but compiling a lot of code will take ages.
The first step is to figure out what processor and instruction set you need to target. In the following I describe how to cross-compile for Raspberry Pi devices which use ARM processors with AVMv6 (Pi Zero, Pi 1) and ARVv7 (Pi 2 and later) instructions sets. To figure out the CPU / instruction set for linux devices, running cat /proc/cpuinfo or uname -a should give the necessary information. Running the latter on a Raspberry Pi 2 outputs:
Linux rpi-home 5.4.79-v7+ #1373 SMP Mon Nov 23 13:22:33 GMT 2020 armv7l GNU/Linux
In particular, for my project I want to deploy the fritzctl binary in order to run a fritzctrl schedule command to turn my outside lighting on and off at sunrise and sunset.
Raspberry Pi 2 and later
The first thing you need to do is to make sure the stdlib for the target architecture is installed. For the purpose of targeting a Raspberry Pi 2, the ARMv7 target will do as determined above. You can either use the gnu or musl variant, I used
rustup target add armv7-unknown-linux-musleabihf
Note the “hf” here which is normally what you want. It means that floating point operations will use the hardware support provided by the chip as noted in the musl-libc wiki.
This alone didn’t do as dependencies also required to be compiled native using gcc. The gcc of your host system (MacOS in my case) will not be able to output the right format and might even have an incompatible compiler / linker interface. So you’ll likely need to install a gcc toolchain as well. Over at lisa.musl.cc you can download armv7l-linux-musleabihf-cross.tgz which will contain gcc and linker binaries (the binaries from mac.musl.cc did not work for me for some reason). Direct link to the .tgz file.
Then, we’ll need to inform cargo to use a different linker. Create a file .cargo/config.toml and specify the linker, in my case the file looks like
[target.armv7-unknown-linux-musleabihf]
linker = "armv7l-linux-musleabihf-gcc"
Now the last step is to run cargo build using the ARM target and making sure that the different linker can be found:
PATH=/path/to/armv7l-linux-musleabihf-cross/bin:$PATH \
    cargo build --release --target=armv7-unknown-linux-musleabihf
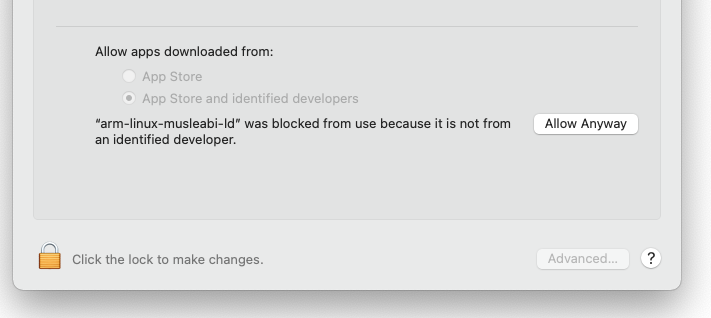
When you run that on MacOS you’ll probably see a MacOS warning like:
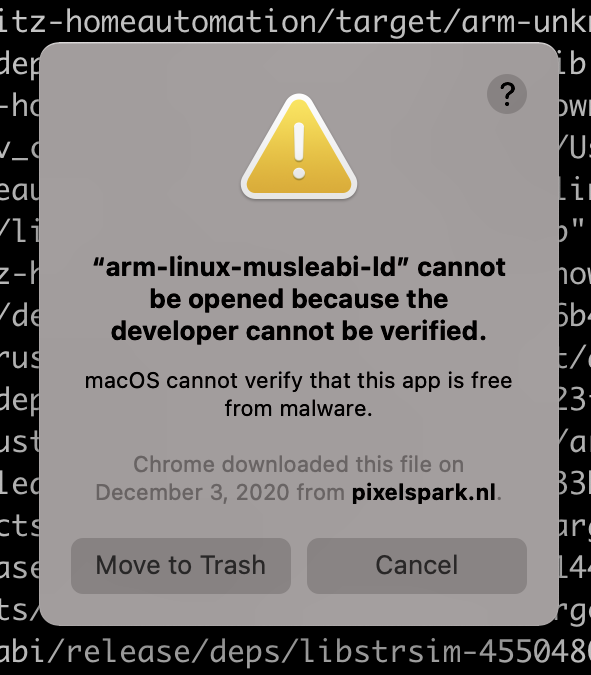
You’ll need to open the MacOS Preferences > Security & Privacy and allow the binary to run.
If everything works you should end up with a binary in target/armv7-unknown-linux-musleabihf/release/. You should then be able to copy that binary directly onto the target machine and run it.
$ scp target/armv7-unknown-linux-musleabihf/release/fritzctl rpi:bin/fritzctl
$ ssh rpi
pi@rpi-home:~ $ ./bin/fritzctl
# ...
For other architectures you’ll need to install the appropriate targets such as x86_64-unknown-linux-musl for example. rustup makes this very straightforward. I have some build issues from time to time with crates that have native dependencies. However, more and more crates now run purely on Rust or provide features to use pure rust dependencies.
If you need an http client for example, the reqwest crate will allow to be build using rustls-tls instead of rust-native-tls which might make it easier to compile.
Raspberry Pi Zero W
The rpi0 (similar to the original Raspbarry Pi version 1) uses the ARMv6 instruction set. Running uname -a gives
Linux rpi0 4.19.66+ #1253 Thu Aug 15 11:37:30 BST 2019 armv6l GNU/Linux
This means the above instructions (for ARMv7) will not produce runnable binaries for it. To compile a compatible binary install the arm-unknown-linux-musleabihf rust target:
rustup target add arm-unknown-linux-musleabihf
Next you will need the right toolchain: arm-linux-musleabihf-cross worked for me. Unpack it and modify your projects .cargo/config.toml to read
[target.arm-unknown-linux-musleabihf]
linker = "arm-linux-musleabihf-gcc"
You should now be able to build a “hello-world” program (e.g. created with cargo new) using
PATH=/path/to/arm-linux-musleabihf-cross/bin:$PATH \
    cargo build --release --target=arm-unknown-linux-musleabihf
Try copying it to your Raspberry Pi 0 and run it:
scp ./target/arm-unknown-linux-musleabihf/release/hello-world pi@rpi0:
ssh rpi0 './hello-world'
(replace rpi0 with whatever hostname or ip address your rpi0 is reachable at)
Summary
Rust is fun to work with not just because the language is well designed but also the accompanying tooling is well thought out. Rust and in particular cargo come with a number of “opinionated” defaults such as how projects are organized that (at least if you agree with and follow them) make it quite straightforward to setup and deploy projects. I’ve never been a fan of strict rules around build systems, in the case of Rust I do, however. This might be because those guidelines come in a large part from the learnings of other such systems like node.js / npm and try to enshrine the best practices used there. Additionally, cargo and rustup are excellent and well documented tools (the cargo book is quite helpful). I look forward to build many more systems in the Rust ecosystem.
-
AVM is a Berlin-based company and mostly known for their routers. In my opinion they make excellent products (I’ve owned several routers and DECT devices so far) that are also fairly hackable. Recommended. ↩︎